...
Benecloud Teams presence integration is a headless background service, which updates the terminal state (in a call/not in a call) of BeneCloud users based on user presence in teamsMicrosoft Teams.
Integration is implemented as a headless background service, which creates and maintains a presence subscription for a set of users and receives notification when the presence of the user is changed. If presence notification indicates that the user is having a Teams call, participating in Teams meeting or sharing a screen, user is set as ‘talking’ in BeneCloud.
Presence integration is one-way, from MS Teams to BeneCloud
| Drawio | ||||||||||||||||||||||||||||||||
|---|---|---|---|---|---|---|---|---|---|---|---|---|---|---|---|---|---|---|---|---|---|---|---|---|---|---|---|---|---|---|---|---|
|
Requirements and limitations
Username
Usernames must match in AzureAD (UserPrincipalName) and in BeneCloud (Email Address)
AzureAD App registration
AzureAD App registration must be created. See detailed instructions below.
AzureAD service account
Presence - read permission, required by Microsoft GrapAPI presence endpoint permissions are currently available only for Delegated (worked or school account) permission Type. Application permission type is not available for Presence - read.
Because of this limitation, a presence subscription must be done as a user. A separate “service account” user must be created, which is used for creating a presence subscription. Service account credentials are configured and used by in MS Teams Presence Integration service to maintain presence subscription.
Requirements for the service account
MFA must be disabled, or BeneCloud IP addresses must be whitelisted
Password should not expire
Office licenses are not required
Limit of users
Current limit of GraphAPI presence subscription is 650 users.
Creating AzureAD
...
App Registration
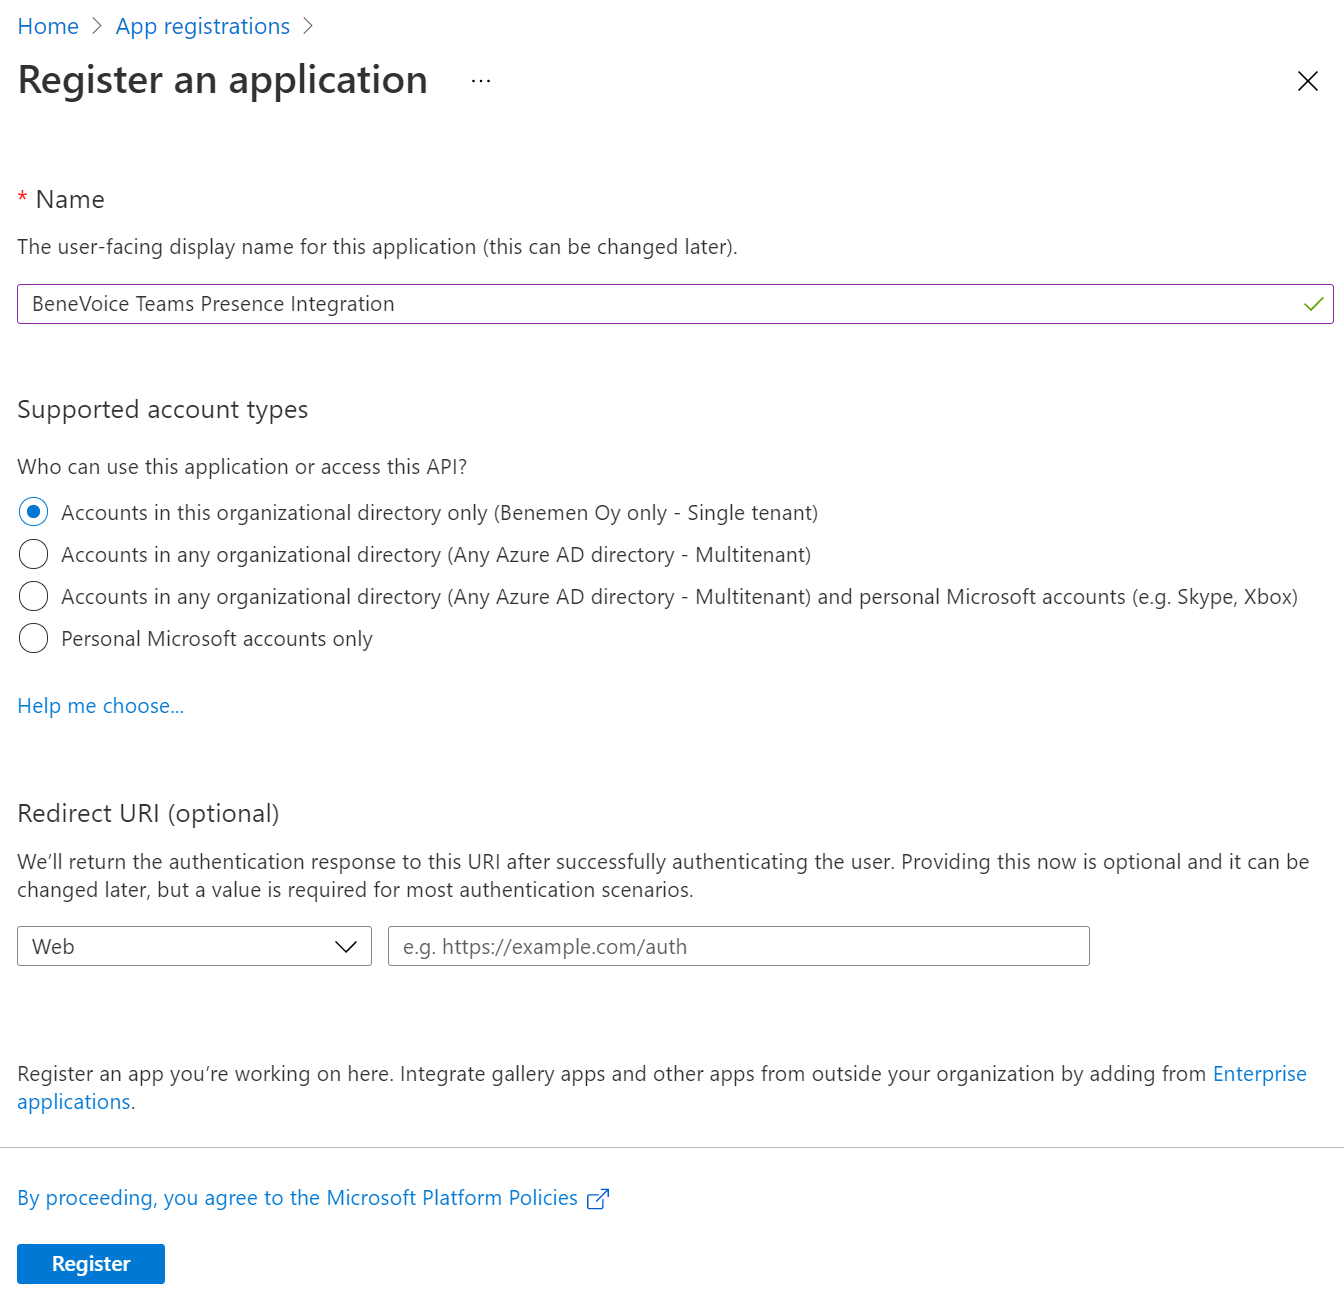
Log in to AzureAD portal Go and go to AzureAD → App registrations → New registration
Enter proper name
Accounts in this organizational directory only
Redirect URI can be left empty
click Register

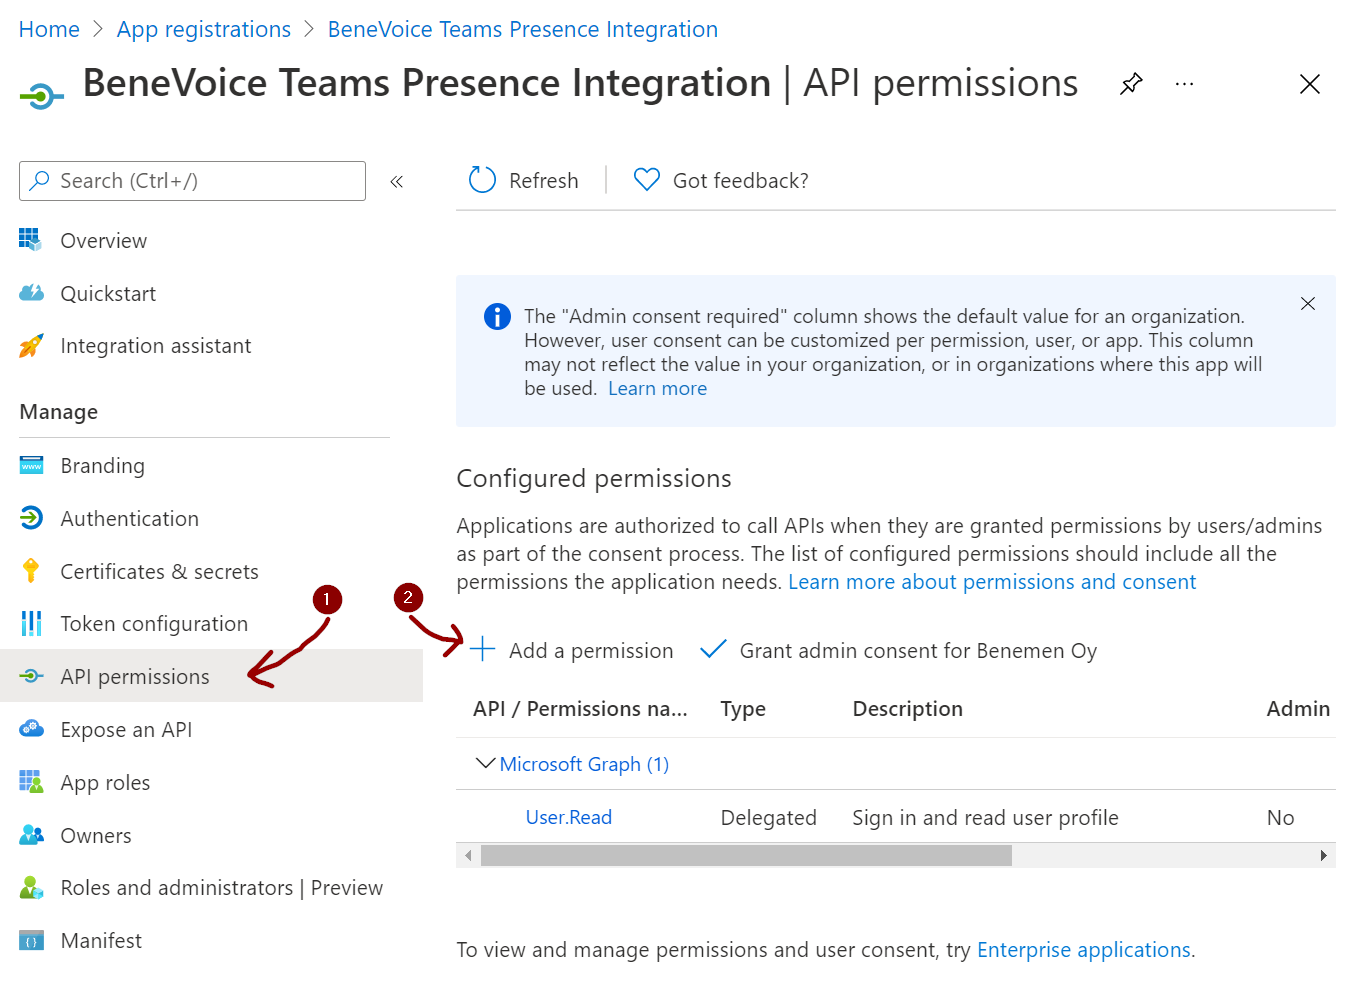
Select API permissions and Add a permission
...
7. Click Grant admin consent and click Yes to the confirmation dialog.
...
...
8. Go to Certificates & Secrets and select New client secret
...
9. Add proper Description, select max expiration time (24 months) and click Add
...
10. Copy Value of the new secret for later use.
...
11. Go to the overview tab, and collect values of Application (client) ID and Directory (tenant) ID
...
12. Send details of App registration to Benemen
Application
...
(client) ID
Directory (tenant) ID
Secret